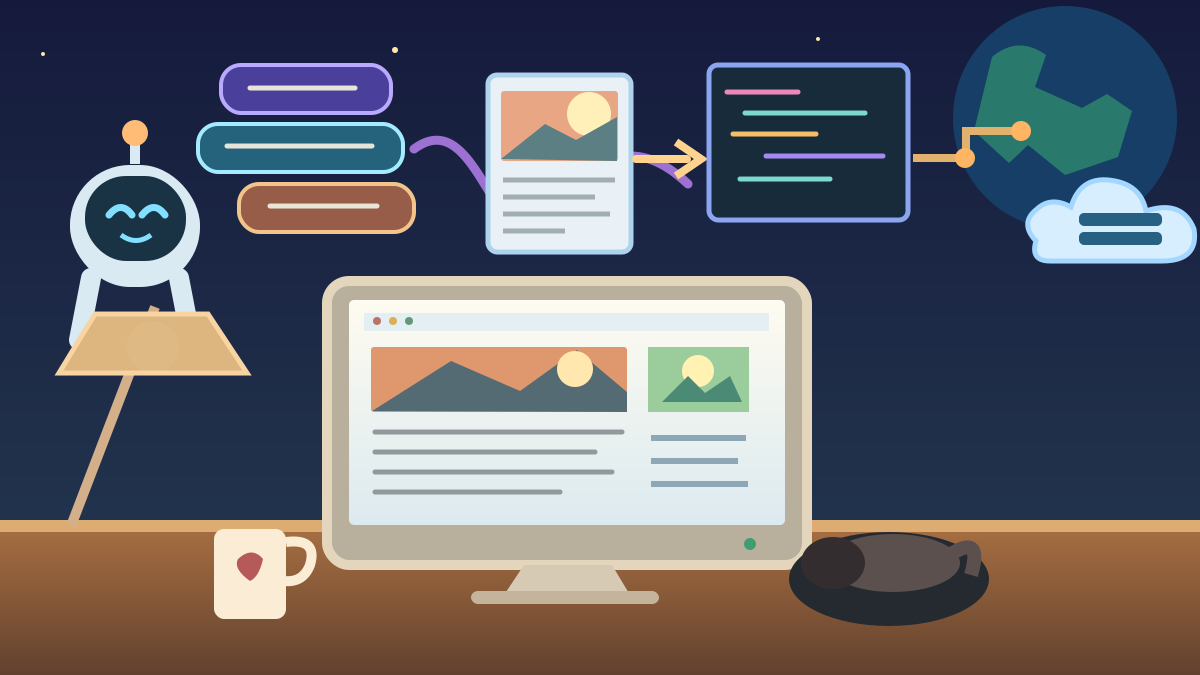
Yesterday I showed my new weblog to somebody on Mastodon. I pitched chrisabraham.net as a return to the internet circa 2006. Nash Ricky replied, “2006 internet was better internet.” When I asked him what he thought of the site, he told me it looked nice and that he wanted something like it for himself. He mentioned Blogspot, the old Google blogging service, and explained that he mostly wanted somewhere to document his life and write a journal. Sharing it with the world was optional.
It occurred to me that the most useful thing I could publish next was a set of instructions. If you can describe the sort of website you want, you can ask an AI coding assistant to help make it. You can have your own address on the web, an archive, old-fashioned links, your own colours, and somewhere to write. You can make the thing wonderfully personal. You needn't learn an entire programming language before you begin.
The design brief I eventually settled on is an automotive one. Think of an ICON 4x4 restomod: the body and temperament of a 2003 or 2004 machine, with a 2026 chassis, engine and brakes. My weblog has that early-blog look. Underneath it are responsive layouts, accessible markup, modern publishing automation, structured data, feeds, and rather more inspection machinery than most personal websites will ever need.
Fortunately, you do not need to be remotely as persnickety as I am. Begin with a personal homepage and one post. The rest can arrive when you fancy it.
First, what I actually built
The source code is public at github.com/chrisabraham/weblog. Please inspect it, copy the ideas, and notice the important thing: my site does not use Jekyll. Jekyll is one of many programs that assemble pages from content and templates. It's a perfectly respectable choice. I originally mentioned it because I knew it was associated with GitHub Pages. The weblog itself uses a custom Python script called build.py.
That Python program reads articles from src/posts/, wiki entries from src/wiki/, images from src/media/, and site settings from src/site.json. It uses templates and src/style.css to generate finished HTML pages in docs/. GitHub Pages serves the resulting HTML, CSS, pictures, and feeds. Nobody visiting the finished website needs to run Python. In fact, there is no Python application running on GitHub Pages when you open an article in your browser.
your-repository/
  build.py
  src/
    posts/
      2026-10-17-my-first-post.html
    wiki/
      getting-started.html
    media/
      my-picture.svg
    style.css
  docs/
    index.html
    ...generated pages...
    .nojekyll
  .github/
    workflows/
      site-build.yml
That's a sketch of the idea, not a file-for-file copy of my rather elaborate repository. The source is your workshop. The docs/ directory is the finished car. You change things in the workshop and let the builder produce the car again. My repository uses GitHub Actions to run the builder and publish the generated files. A beginner can choose a simpler GitHub Actions deployment instead of committing an entire generated docs/ folder.
If you want a real example, open my builder and the posts folder. It is a functioning publishing system, with decades of weblog culture baked into its appearance and a rather contemporary obsession with making everything inspectable.
What you need before asking AI to build anything
- A GitHub account. Sign up at github.com. GitHub stores your website files and remembers each change, so you can recover an earlier version.
- An AI coding assistant. Claude Code or OpenAI Codex is the most direct route for asking a machine to edit a repository. You can also begin in ChatGPT or ordinary Claude chat and copy the generated files yourself.
- A name. A weblog title, a short description, and perhaps three favourite colours will do. A custom domain is optional.
- One thing to say. You can write a diary entry, a book note, a project update, or your thoughts about a particularly offensive modern website.
On GitHub, create a public repository named YOURUSERNAME.github.io, replacing YOURUSERNAME with your GitHub username. This special name gives your personal GitHub Pages site a convenient address: https://YOURUSERNAME.github.io/. Add a README when GitHub offers one. A public repository works on GitHub's free Pages tier; keep secrets, private journals and passwords out of it. You can make another repository name work too, but then its normal address includes the repository name as a path, which makes an easy starter lesson needlessly awkward.
Which AI can talk to GitHub?
This is where people get tripped up, because the names of the chat products and the coding agents overlap.
| Tool | What it can do for your weblog |
|---|---|
| Claude Code in a terminal | Work in a local checkout, create and edit files, run the build, and use Git to commit or push when you approve access and actions. |
| Claude Code on the web | At claude.ai/code, use an authorized GitHub repository in a cloud coding session; it can make changes and prepare a pull request to review. |
| Ordinary Claude chat on the web | Read selected GitHub repository files through its integration and help plan, explain or draft changes. Do not assume that selecting a repository in a normal chat gives it the same write-and-publish powers as Claude Code. |
| OpenAI Codex | Work on repositories through its coding workflows, make changes, run checks and prepare code changes or pull requests where the connection and permissions allow. |
| ChatGPT | Draft copy and code and, in some connected or agent-enabled environments, perform supported repository actions. Its ordinary GitHub reading connection is not itself a promise of write access. Check the tools and permissions actually available. |
The safest habit is to let the machine propose a change, inspect its diff, run a build, and only then merge or deploy. Authorize the specific repository you intend to use. A GitHub connection to read your code and a coding agent permitted to write code are different privileges.
Step one: describe the website you want
Start with the visual identity. I would say something like this. Paste the following into Claude Code or Codex with your new repository selected, or use it in ChatGPT to get the initial files.
Prompt 1: Build my personal weblog. Help me build a personal weblog inspired by independent websites from 2003 and 2004. I want a restrained, personal, old-school design with a site title, a short introduction, a latest-posts index, individual dated articles, an archive, an About page and ordinary blue-underlined links. Think early Blogger, personal homepages and RSS-era weblogs, with a 2026 engine. The design must be fully responsive on phones, keyboard accessible, screen-reader friendly, and readable when JavaScript is disabled. Use semantic HTML, simple CSS and a small Python 3 static-site generator. Put my editable content in
src/. Publish finished files as a static site using GitHub Pages and GitHub Actions. Keep dependencies minimal and explain the structure to me like I am a beginner. Do not install a giant framework or invent advanced features. Show me a working first page.
Tell the assistant what you like. “A serif body font and orange headings.” “A narrow column because I want it to read like a letter.” “More like a 2004 Movable Type blog.” “Keep the archives prominent.” If you have an existing blog, ask it to preserve your URLs and links. If it shows you something you dislike, tell it what you dislike. You are allowed to be the creative director of your own bloody website.
Step two: make the source files and a builder
Ask the coding agent to create a simple build.py program that reads posts and writes HTML pages to a public output directory. At the beginning you only need build.py, src/style.css, and one file in src/posts/, plus the publishing workflow the agent creates. You can have it store posts as Markdown or as basic HTML with a few metadata lines. My own posts use a small header, a line containing three hyphens, and ordinary HTML afterward.
title: My first weblog post
date: 2026-10-17 10:00
categories: Journal
description: The first entry on my new personal weblog.
---
<p>Hello, internet. I have a home here now.</p>
The date above is only an example. Use the actual date and time when you publish. If the coding agent chooses Markdown instead, that is fine. There is no sacred post format.
Prompt 2: Make the publishing engine. Implement the smallest sensible Python builder for my weblog. Read dated posts from
src/posts/, escape metadata safely, generate an HTML homepage with one-paragraph teasers, generate a separate permalink page for every full article, and make an archive page. Use one CSS file and valid HTML with a viewport meta tag, descriptive page titles and internal links that work at the root of aYOURUSERNAME.github.iosite. Create a GitHub Actions workflow that runspython3 build.py, checks that the output includesindex.html, then deploys the generated static output with the supported GitHub Pages artifact actions. Explain every file you added. No content-management system and no JavaScript dependency.
Ask the agent to run python3 build.py and show any errors. If you are using Claude Code locally, open the finished output with python3 -m http.server 8000 --directory docs (or whichever output folder it chose), then visit http://localhost:8000/. If you are using a cloud coding agent, request a preview or inspect the generated output and pull request before merging.
Step three: put it online with GitHub Pages
- In GitHub, make sure your proposed files are committed or your coding agent's pull request has been reviewed and merged into
main. - Open your repository's Settings, then Pages.
- Under Build and deployment, select GitHub Actions as the source, because your workflow needs to run Python before the finished HTML exists.
- Open the repository's Actions tab. Watch the build and deployment. A green check is encouraging; a red failure is a request to investigate, not to pretend the site launched.
- Visit
https://YOURUSERNAME.github.io/. Open a full article. Try it on your phone. Follow the archive link. If it fails, give the coding assistant the exact error from GitHub Actions.
GitHub Pages cannot run a Python web server for each visitor. Your workflow runs Python ahead of publication and sends GitHub Pages the resulting static HTML. This difference is why the site can be cheap, quick, and pleasantly uncomplicated. GitHub also supports publishing a prebuilt docs/ folder from a branch, the method my present repository uses. In that case the output includes .nojekyll, an empty file telling Pages not to run Jekyll over the already generated HTML. Either method can work. Choose one deployment arrangement, and have the agent document it.
A custom domain can wait. Once the site works, add a domain in GitHub's Pages settings and configure DNS with your registrar according to GitHub's domain guide. Verify that you own it and turn on HTTPS where available. A personal domain is lovely, though the free github.io address is a perfectly genuine website.
The free Cloudflare DNS layer I should have told you about
I left out a very practical part of how I run my own websites: Cloudflare. All five of my sites use Cloudflare's free DNS service. I like having my domain settings in a consistent, understandable dashboard. I can point a domain at a new website, add a subdomain, check where mail is supposed to go, and change things without treating every DNS adjustment as a dark ritual. For me, Cloudflare is part of the pleasure of running my own little empire of websites.
DNS is an address book for the internet. Your domain is the name people remember; DNS records tell browsers where to find your site and tell mail servers how to handle mail for that name. Paying for a domain registration is separate from paying for DNS hosting, which in Cloudflare's free plan can cost nothing. It is also separate from website hosting: I use Cloudflare for DNS even when the actual pages live on GitHub Pages or another provider. You do not have to use Cloudflare to follow this tutorial, and the free YOURUSERNAME.github.io address needs no purchased domain at all.
Domain registration itself still costs money unless somebody offers a genuine promotion. Registrars charge different prices and renewal rates; I would not claim every domain is sold at the same retail markup. Cloudflare Registrar offers supported extensions at registry and ICANN cost without an additional markup. That's a separate product from its free authoritative DNS. You can buy your domain elsewhere and still use Cloudflare DNS for free. If you move registration to Cloudflare Registrar, read its nameserver and registrar rules first.
How to point your own domain at GitHub Pages using Cloudflare
- First, finish publishing the
github.ioversion of the site and make sure it works. Buying a domain is optional. - If you do own a domain, make a free Cloudflare account and add the domain. Before changing anything at the registrar, carefully compare every imported DNS record with your existing DNS provider. Preserve mail records such as MX, SPF, DKIM and DMARC, plus any verification records or other services you use.
- Cloudflare gives you the authoritative nameservers for your zone. If everything was copied correctly, replace the old nameservers at your domain registrar with the ones Cloudflare assigned. Allow time for the change to propagate. If DNSSEC was enabled at the old provider, follow Cloudflare's migration guidance rather than leaving an obsolete DS record in place.
- In your GitHub repository's Settings → Pages, add the exact custom domain you want. Verify domain ownership if GitHub asks, and consult GitHub's current DNS instructions. For the bare domain, the usual GitHub Pages setup uses four
Arecords at@, pointing to185.199.108.153,185.199.109.153,185.199.110.153and185.199.111.153. Forwww, create aCNAMEpointing toYOURUSERNAME.github.io, not a full article URL. - In Cloudflare, start the GitHub Pages web records as DNS only, the grey cloud, so you can verify GitHub's domain mapping and HTTPS certificate without a second proxy complicating the test. Cloudflare's orange-cloud proxy is a separate, optional feature with its own HTTPS, caching and security behaviour. You can explore it later, once the site and certificate work, and only if the configuration suits your host.
- Test both the bare and
wwwaddresses. Confirm the intended address is canonical and that GitHub Pages offers HTTPS. Visit the site, click links and make sure email still works. Do not use wildcard GitHub Pages DNS records just to save yourself a few minutes; GitHub warns against them.
Once the DNS basics are settled, Cloudflare has all sorts of optional facilities worth exploring as your site grows: redirects, proxying, caching, protection, analytics, edge logic and more. Some are included in free tiers and others are paid or subject to limits. You need not turn any of them on to have a complete website. Free DNS and simple control are the first things I recommend looking at. I have enough of the other toys to investigate later, when there is a genuine problem to solve.
Optional DNS prompt: Help me connect my GitHub Pages personal weblog to a custom domain using Cloudflare's free authoritative DNS. First ask which registrar currently holds my domain and whether I use email on it. Inventory and preserve all existing records before suggesting a nameserver change. Use GitHub's current Pages documentation for the necessary apex and
wwwrecords. Start with DNS-only records, check GitHub domain verification and HTTPS, explain every step in plain English and do not change DNS or registrar settings without my approval.
Step four: publish something by talking to your assistant
My weblog is unusual because I publish the human assignments as well as the resulting AI articles. You are free to do the same, but you could also simply write your own entries. The point is that the workflow should be simple enough to use regularly.
Prompt 3: Publish a new post. Take the following journal entry exactly as I wrote it, fix only obvious typos unless I ask for a rewrite, and turn it into a dated article on my weblog. Give it a useful title and short summary. Put the entire article on its own permalink and a brief excerpt on the homepage. Update the archive and any feeds that exist. Run the builder and tests. Show me what changed before committing or opening a pull request. Here is my entry: [PASTE YOUR WORDS HERE].
Don't allow the assistant to quietly delete an old article or overwrite a memory because it believes it can improve the prose. Git history is a wonderful undo button, but it is even nicer when the original words remain where you left them.
Step five: make it yours rather than mine
Ask for small, distinctive changes: a sidebar with a blogroll, a now page, a page about your favourite records, a guestbook that links to an external service, or a list of the books on your bedside table. Your first site can be a remarkably competent digital notebook. It need not announce a personal brand or a business model. A weblog may simply be somewhere you keep things you would otherwise lose.
Here is the tiny computer ChatGPT drew for this article. It has the expression of a very enthusiastic assistant that has just been asked to make the footer a little smaller for the thirty-seventh time.

Prompt 4: Give my website its character. I want an early-web personal site with real visual personality, but please preserve modern usability. Keep the page quick to load, body text readable, link states visibly distinct, image alt text meaningful, and the layout fluid on a narrow phone screen. Add a blogroll, monthly archives, a concise About page and an optional light/dark preference. Never let the period styling make the site harder to use. Show me before-and-after screenshots or a working preview where available.
Optional: become as persnickety as the proprietor
I have taken the simple idea rather far. I told my ChatGPT and Claude friends to be so compliant that their heads would explode, particularly about web standards. Mine is a website that wants to look like 2004 while making a serious effort to satisfy 2026 readers, including people who cannot see the page and people who browse with a keyboard, a screen reader, or Lynx, the text-only browser. A screen-reader test, a keyboard-only test, a reduced-motion check and a text-browser pass reveal different kinds of problems. Passing a static checker is useful; it is not a certification that a site meets every requirement of the ADA or WCAG.
The extra equipment includes RSS 2.0, Atom, feed autodiscovery, OPML subscriptions, descriptive alt text, HTML headings in sensible order, accessible labels and landmarks, canonical URLs, a sitemap, robots.txt, honest structured data, author attribution, visible corrections, and human-readable records of changes. I care about image sizes, link integrity, metadata and mobile responsiveness. I run build audits. I consider Core Web Vitals and PageSpeed Insights suggestions as evidence to investigate, not as a magic score whose pursuit should wreck the experience.
There is also a wiki, a feed, and rather elaborate machine-readable documentation of the publishing experiment. There are full-text AI-generated illustrations. Most of the published writing is generated by AI at my direction, and the articles disclose the model and the original prompt. Git commits and public handoffs tell readers what happened between versions. I've even developed a house rule about how to spell the possessive of Chris.
Creative Commons is another choice to make deliberately. Decide what you own and what you wish to license. A Creative Commons licence chooser can help; a licence applies to material you have rights to license, and licensing your original text needn't mean licensing someone else's photographs, trademarks or quoted material. Add a clear statement specifying which parts of your site the licence covers. A credit and an alt description are not substitutes for permission.
Prompt 5: The full restomod inspection. Review this weblog as if it has a 2004 body and a 2026 chassis. Audit keyboard-only navigation, focus visibility, mobile reflow, zoom, screen-reader semantics, colour contrast, reduced motion, missing alt text, heading structure, Lynx/text-only usability and operation without JavaScript. Then check internal links, canonical metadata, RSS and Atom validity, feed autodiscovery, sitemaps, structured data where genuinely justified, robots controls, image optimization and PageSpeed Insights opportunities. Add tests where sensible. Distinguish confirmed failures from suggestions and from things you cannot verify. Make only changes you can explain. Do not claim ADA or WCAG certification, a Lighthouse score, or validated rich results without evidence.
That is a later assignment. You do not need an OPML export or a structured data graph to write about breakfast. You can make a perfect little weblog with half a dozen pages, tasteful CSS, accessible links, and zero interest in analytics. My site is complicated because I keep giving my assistants jobs and insisting they leave records. It is not complicated because a personal weblog requires that complication.
Maintain it like a small, cherished machine
After each change, ask the assistant to show the changed files, run the build, test the links, and explain what it could not check. Do not give it passwords in a post or a public repository. Do not merge an unexpected deletion. If a build breaks, bring the error log back to the assistant and ask it to repair the actual failure. GitHub history is your friend. Keep a copy of your writing somewhere you control, even though GitHub already retains revision history.
If your ambition grows, the evergreen guide in the Chris Abraham wiki tracks the essential layout, commands, prompts, and official documentation without forcing this dated conversation to become a perpetually rewritten article. That is the distinction between an old blog entry and a reference page: the original story stays where it was; the manual can be revised as the machinery changes.
You're allowed to have a home on the internet
Part of what I miss about the old web is the sheer number of places that were unmistakably somebody's. They had favourite links. They sometimes looked terrible. Their owners were enthusiastic about things of no commercial importance whatsoever. Nobody had told them to build a content funnel.
You can still do that. You can make a website that looks as though it escaped from 2004 and runs beautifully on a phone in 2026. You can ask an AI to build the bones and still decide what the place ought to feel like. You can write one entry and go to bed.
Nash Ricky wanted something for documentation and journaling, perhaps without much interest in sharing it. That is reason enough. If it is private, keep the repository and publication private or use a genuinely private storage solution; a public GitHub Pages site is public, however quiet it may be. If you are comfortable being read, publish. If you would rather keep a notebook, build an offline copy first.
Start with a blank repository and a conversation. The rest is a series of small, entirely manageable requests. You can have your own little patch of internet again.
How this article was made: Chris Abraham assigned this tutorial in conversation, clarified repeatedly that readers should reproduce his actual Python and GitHub Pages approach, and supplied the ICON 4x4 restomod comparison and the extraordinary persnickety checklist. ChatGPT (GPT-6) wrote the article from those instructions and inspected the live repository before drafting. The prompt below preserves his original assignment and follow-ups. The SVG illustrations were drawn by ChatGPT with accessibly described shapes. The longer-lived companion material lives in the wiki. Official product documentation was consulted October 17, 2026.
Editorial update, October 17, 2026, 10:26 AM ET (ChatGPT): Chris pointed out that I had omitted Cloudflare DNS, which he uses for all five of his websites. I added an optional Cloudflare guide, distinguished domain registration from DNS and hosting, included a cautious custom-domain setup for GitHub Pages, and linked to the authoritative provider instructions. His exact correction is appended to the prompt metadata. This expands the existing article transparently; the original remains in Git history.